
Real Renders
Computer rendering is an often-overlooked step of the interior design process. By entering a space's measurements and materials into a rendering program, we are able to get a photorealistic view of how a space will turn out. In this article we will share a few renders from jobs we are currently working on as well as a brief description of the project. Without further ado, let's begin!
Stunning Steele Place Addition
This client has a 1930s colonial style home located on a beautiful acre of land in the city. The interior of the home was traditionally four square and compartmentalized. A few years ago, the clients had a master suite, utility room and workout space added on, but it still landed on the lower end square footage wise compared to the rest of the homes in the neighborhood. The clients decided to call us in to help design a kitchen addition with a breezeway sunroom that connects the new kitchen space to the existing carport. They also wanted to rework their current utility into a guest bathroom and create a new utility/mudroom off of the carport. With the help of our draftsman, we recently completed the preliminary set of construction documents for this project.
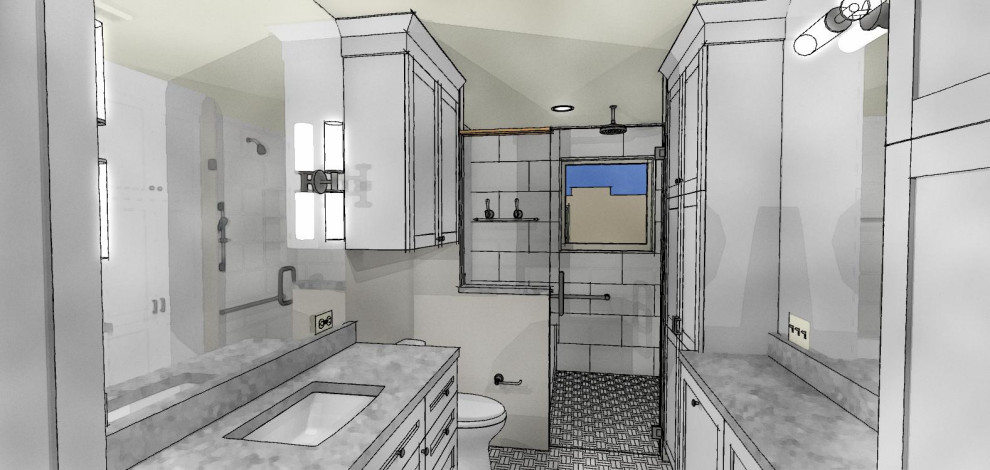
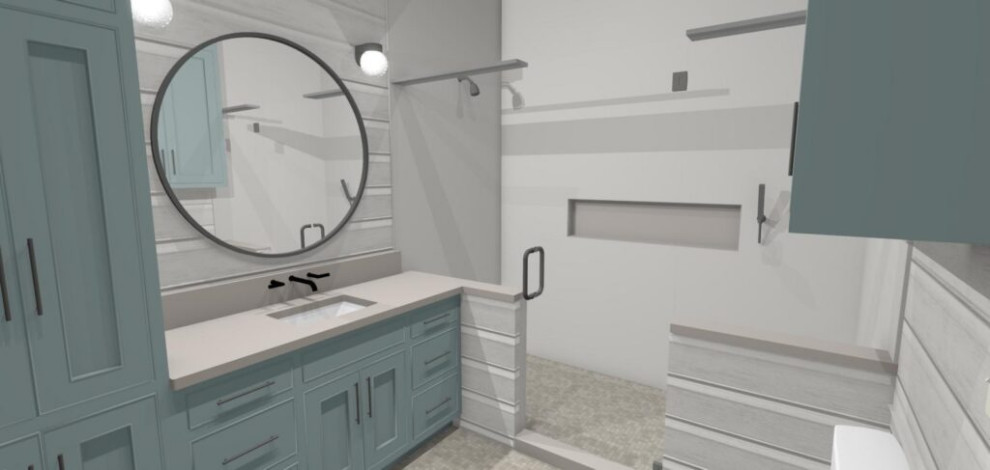
Big Things in Small Places
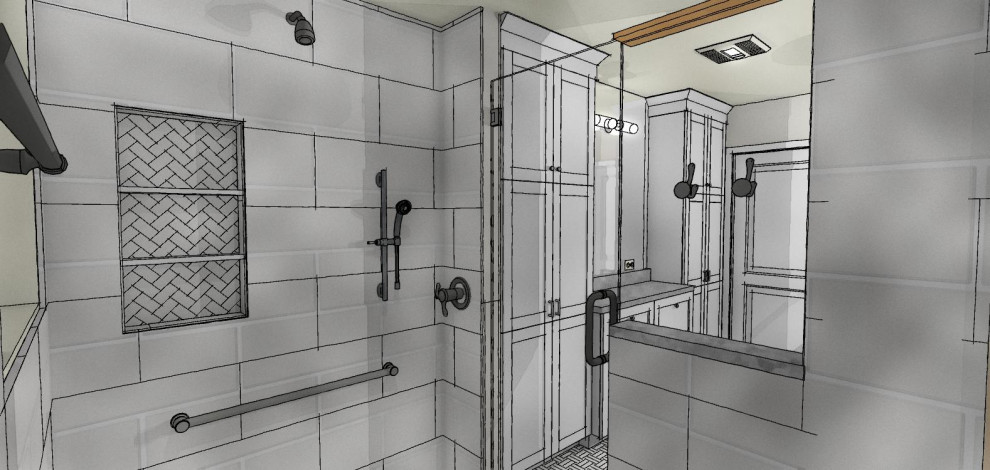
This client has a 1960s ranch style home located near the Garden District. The bathrooms were originally on the smaller side and covered with pink and green retro tiles, consistent with times when the home was built. The master bathroom was too narrow, so we decided to eat up the closet in the adjacent guest bedroom to widen the space. Then we pulled the toilet out of the water closet with the shower and created a wet room with a separate tub and shower. Widening the bathroom also allowed us to increase the amount of counter space and storage. For materials, we chose a grey palette with marble countertops and mosaic flooring. This project is currently under construction, so stay tuned for progress photos!
Just Around the Riverbend
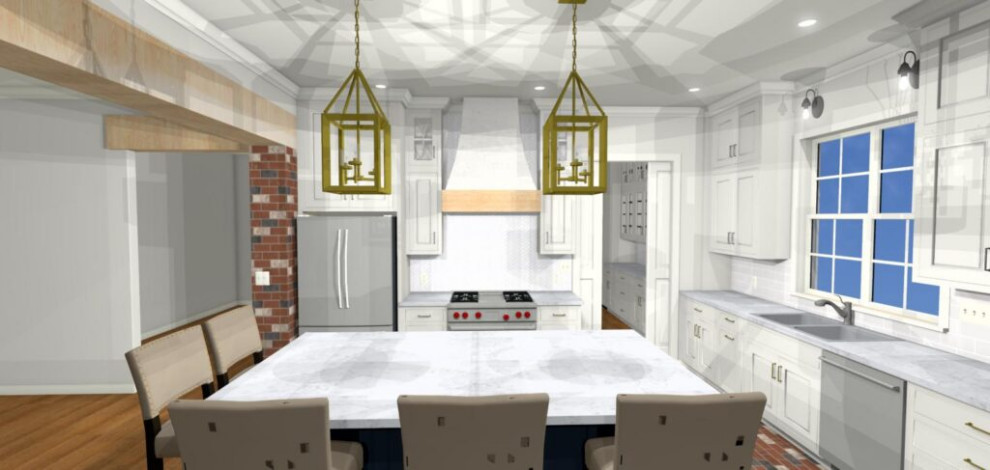
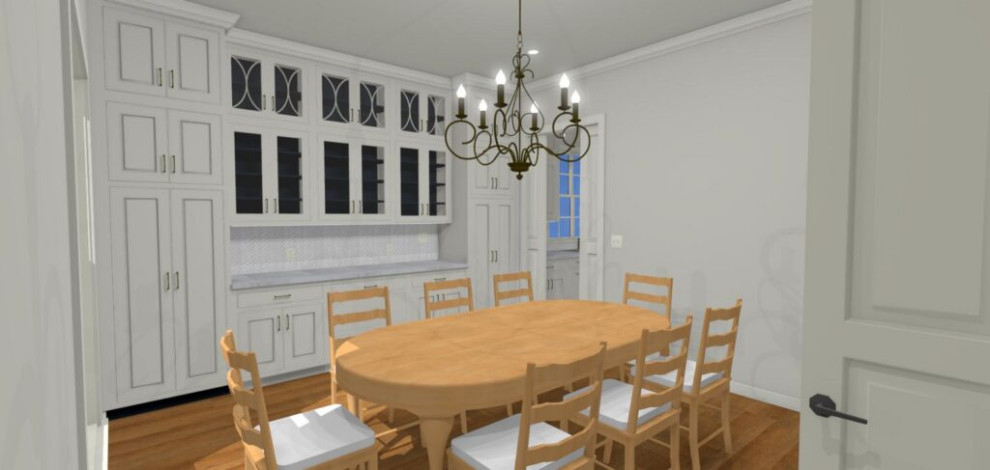
These clients came to us for help with remodeling their kitchen which was not big enough to accommodate a decent size island. The adjacent dining room was very large so we moved the wall separating the kitchen and the dining back by two feet, giving us the extra room we needed for a nice size island in the kitchen while still leaving plenty of dining space. We expanded the window over the kitchen sink to bring in more daylight. We removed the wall between the kitchen and living and framed the opening with brick columns and a wood beam. The kitchen layout is an L-shape with the range and sink on separate walls and the island in the center. In the dining room, we designed beautiful built-ins with glass doors for China display and storage as well as a large pantry storage with pullouts. The home has beautiful ten foot ceilings, so we decided to bring all of the cabinets up to the ceiling to add even more storage. The color palette we chose for this project was mostly creamy whites with navy blue accents on the island and in the dining room.